Transform your outdoor space into a tranquil retreat with a captivating water feature! Imagine leveraging high speed internet to turn on your waterfall from your smartphone. From soothing waterfalls to elegant fountains, adding a water element to your backyard oasis can create a serene and relaxing atmosphere. In this step-by-step guide, you will learn how to successfully install a water feature in your own backyard. Discover the essentials of planning, designing, and implementing your dream water feature, and bring the soothing sounds of water to your outdoor sanctuary. With our comprehensive guide, you can easily elevate the beauty and ambiance of your backyard oasis with a stunning water feature that will be the envy of all your neighbors.
Planning for Your Water Feature
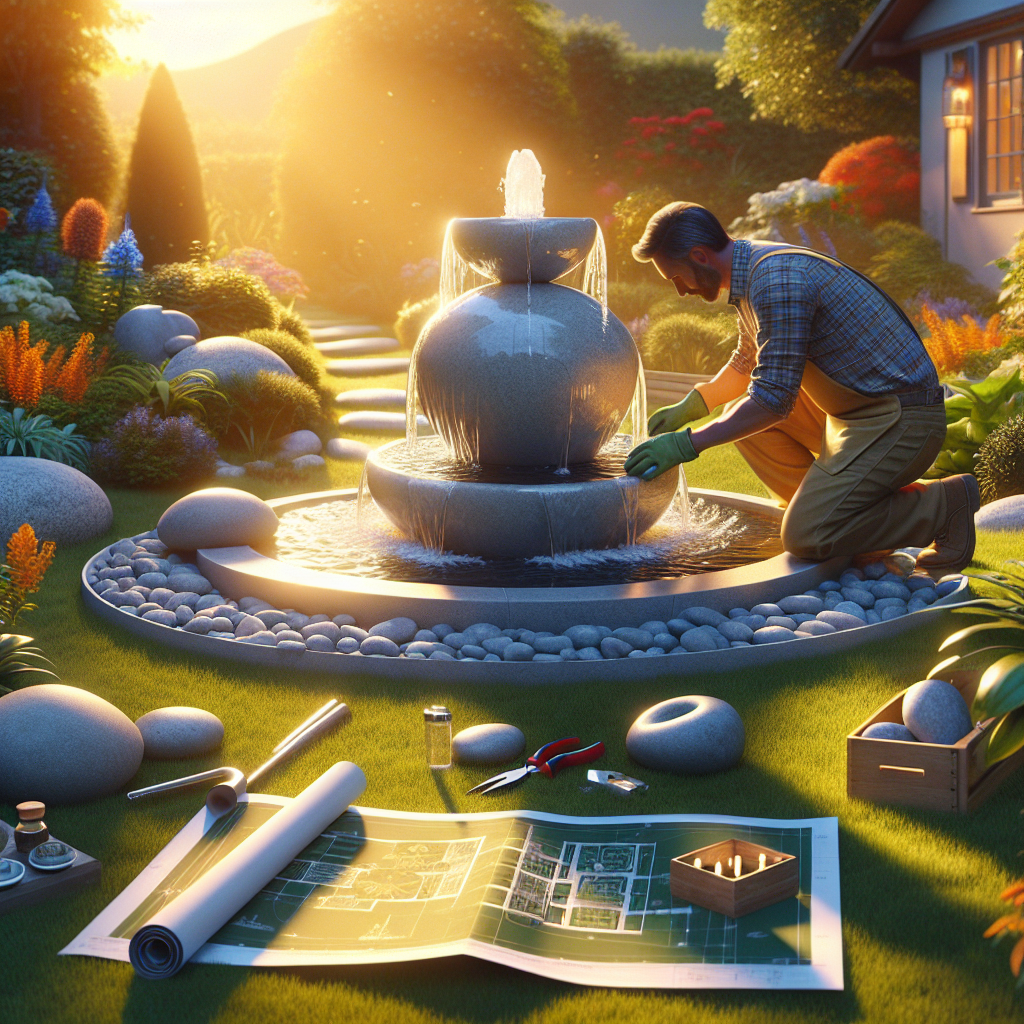
Installing a Water Feature in Your Backyard Oasis: A Step-by-Step Guide
When considering the installation of a water feature in your backyard oasis, proper planning is crucial to ensure a successful outcome. Here are the essential steps to take during the planning phase:
Assessing Your Backyard Space
Before selecting a water feature for your backyard, it is important to assess the available space to determine the size and placement of the feature. Consider factors such as the dimensions of your yard, existing landscaping elements, and any potential obstacles that may affect the installation process. Take measurements and create a rough sketch of your backyard to visualize how the water feature will fit into the space.
Determining the Type of Water Feature
There are various types of water features to choose from, including fountains, ponds, waterfalls, and streams. Consider the overall aesthetic of your backyard oasis and select a water feature that complements the existing design elements. Additionally, factor in maintenance requirements, water consumption, and the desired sound and visual effects when deciding on the type of water feature that best suits your space.
Setting a Budget for the Project
Establishing a budget for your water feature project is essential to avoid overspending and ensure that the installation stays within your financial means. Consider costs such as materials, labor, permits, and ongoing maintenance when setting your budget. Research the average prices for the type of water feature you have chosen and create a detailed budget that includes all potential expenses to help guide your project planning.
Planning for Your Water Feature
Measuring the available area
When considering installing a water feature in your backyard oasis, the first step is to accurately measure the available space. This measurement includes not only the dimensions of the area where you plan to place the water feature but also factors in any surrounding landscaping elements and structures. By having precise measurements, you can ensure that the water feature will fit seamlessly into your outdoor space without overwhelming the area.
Considering the landscape and existing elements
Before proceeding with the installation of a water feature, it is essential to assess the overall landscape of your backyard. Take note of existing elements such as trees, shrubs, flower beds, and hardscaping features like patios or walkways. Understanding how these elements interact with the proposed location of the water feature will help you create a cohesive and visually appealing backyard oasis.
Evaluating sunlight and shade patterns
Another crucial aspect to consider when assessing your backyard space for a water feature is the sunlight and shade patterns in the area. Different water features may have specific sunlight requirements for optimal performance and aesthetic appeal. By evaluating the amount of sunlight the proposed location receives throughout the day, you can choose a water feature that will thrive in its environment and enhance the overall ambiance of your backyard oasis.
When considering installing a water feature in your backyard oasis, the first step is to determine the type of water feature that best suits your space and preferences. This decision involves several key considerations to ensure the end result complements your outdoor environment seamlessly.
- Choosing between a pond, fountain, or waterfall: Each type of water feature offers distinct benefits and visual appeal. Ponds provide a tranquil setting for aquatic plants and fish, while fountains add a touch of elegance and soothing sound. Waterfalls create a dynamic focal point with the gentle sound of cascading water.
- Researching different styles and designs: Explore various styles and designs of water features to find one that resonates with your backyard oasis vision. Whether you prefer a modern, minimalist fountain or a naturalistic pond surrounded by rocks and greenery, researching different options can help you narrow down the choices.
- Ensuring the water feature aligns with your backyard’s aesthetic: It is essential to select a water feature that complements the existing aesthetic of your backyard oasis. Consider factors such as the overall landscaping theme, color palette, and architectural elements to ensure the water feature enhances the visual appeal of the outdoor space.
lanning for Your Water Feature
When it comes to setting a budget for your water feature project, there are several key steps to consider in order to ensure that you have a clear understanding of the costs involved. Here are some detailed points to help you navigate this crucial aspect of planning:
- Estimating costs for materials and labor: Begin by researching the prices of the materials you will need for your water feature, such as the pump, piping, rocks, and any decorative elements. Additionally, consider the cost of labor if you plan to hire professionals to assist with the installation.
- Researching pricing for various water feature options: Different types of water features come with varying price tags. Whether you are considering a pond, fountain, or waterfall, take the time to explore the costs associated with each option. This will help you determine which type of water feature aligns best with your budget.
- Planning for any additional expenses or upgrades: It’s important to factor in any potential additional expenses that may arise during the installation process. This could include unexpected repairs, permit fees, or enhancements to customize your water feature to your liking. By planning for these contingencies upfront, you can avoid budgetary surprises down the line.
Gathering Materials and Tools
In order to successfully install a water feature in your backyard oasis, it is essential to gather the necessary materials and tools before beginning the project. Here is a comprehensive list to ensure you have everything you need:
- Materials Needed for Installation:
- Water feature (such as a fountain, pond, or waterfall kit)
- Pond liner or reservoir
- Pump
- Tubing
- Decorative rocks or stones
- Water plants (optional)
- Water treatment chemicals
- Electrical extension cord (if needed)
- Waterproof sealant
- Tools Required for the Project:
- Shovel
- Level
- Tape measure
- Utility knife
- Screwdriver
- Adjustable wrench
- Gloves
- Safety goggles
- Hose
- Wheelbarrow (for moving rocks or soil)
- Power drill (if necessary for securing components)
- Safety Equipment and Precautions:
- Prioritize safety by wearing gloves and safety goggles throughout the installation process.
- Be cautious when working with electrical components near water sources.
- Ensure the area is clear of any obstacles that could pose a tripping hazard.
- Take breaks as needed to prevent strain or fatigue during the project.
- If using power tools, follow the manufacturer’s instructions and safety guidelines carefully.
List of Materials Needed for Installation
- Pond liner or fountain basin: The foundation of your water feature, a pond liner or fountain basin is essential for holding the water in place and preventing leakage. Choose a durable material that fits the size and shape of your desired water feature.
- Pump and tubing: A pump is crucial for circulating water in your water feature, creating movement and soothing sounds. Ensure the pump is suitable for the size of your water feature and choose tubing that is compatible and the right length for your setup.
- Rocks, stones, and decorative elements: Adding rocks, stones, and other decorative elements can enhance the aesthetic appeal of your water feature. Select a variety of sizes and shapes to create a natural look and consider incorporating elements like driftwood or statues for a personalized touch.
- Water plants (if desired): Incorporating water plants can introduce biodiversity to your water feature and enhance its visual appeal. Consider plants like water lilies, lotus, or water hyacinth to add color and texture to the surroundings. Be sure to choose plants that thrive in water environments and complement the overall design of your backyard oasis.
Tools Required for the Project
- Shovel and digging tools: These are essential for excavating the area where the water feature will be installed. A sturdy shovel will help you dig the right depth and shape for the feature, while digging tools such as a spade or a trowel can assist in more precise adjustments.
- Level and measuring tape: Ensuring that the water feature is level is crucial for its functionality and aesthetic appeal. A level will help you determine if the ground is even, while a measuring tape will assist in accurately marking out the dimensions of the feature to be installed.
- Gloves and safety goggles: Safety should always be a priority when working on any project. Gloves will protect your hands from blisters and cuts, especially during digging and lifting heavy materials. Safety goggles are essential to shield your eyes from debris or splashing water during the installation process.
- Hose for filling the water feature: Once the water feature is in place, a hose will be needed to fill it with water. Make sure the hose is long enough to reach the feature comfortably and that it can provide a steady flow of water for proper filling.
Safety Equipment and Precautions
When embarking on the installation of a water feature in your backyard oasis, it is crucial to prioritize safety at all times. Here are some essential safety equipment and precautions to keep in mind:
- Ensuring proper electrical connections for the pump: Before starting the installation process, make sure to have a qualified electrician set up the electrical connections for the water feature pump. This will help prevent any electrical hazards and ensure that the pump functions safely and efficiently.
- Using caution when handling heavy rocks or equipment: Water features often involve heavy rocks, stones, or equipment that can pose a risk of injury if not handled properly. Always use proper lifting techniques, wear sturdy gloves, and have a helper assist you when moving heavy items to prevent strain or accidents.
- Following manufacturer’s guidelines for installation: Each water feature will come with specific installation instructions provided by the manufacturer. It is crucial to carefully read and follow these guidelines to ensure the safe and proper installation of the water feature. Deviating from the manufacturer’s recommendations could result in damage to the equipment or pose a safety risk.
Digging and Excavating
To begin the installation process of your water feature in the backyard oasis, the first crucial step is marking the area for excavation. This involves outlining the specific location where the water feature will be situated, taking into consideration factors such as proximity to power sources, visibility from key vantage points, and the overall aesthetic of the landscape design.
Once the area has been marked, the next step is digging the foundation for the water feature. This excavation process requires careful planning to ensure the proper depth and dimensions are achieved to accommodate the chosen water feature. The depth of the excavation will depend on the type of water feature being installed, whether it’s a pond, waterfall, or fountain.
Creating a sturdy base for the water feature is essential to ensure its stability and longevity. This involves compacting the soil at the bottom of the excavation site to provide a solid foundation for the water feature to rest upon. Additionally, adding a layer of sand or gravel can help level the base and improve drainage to prevent water accumulation around the feature.
By meticulously following these steps in the digging and excavating phase of installing a water feature, you can lay a solid groundwork for the rest of the installation process, setting the stage for a stunning addition to your backyard oasis.
Marking the Area for Excavation
When preparing to install a water feature in your backyard oasis, the first crucial step is marking the area for excavation. This process ensures that the water feature fits seamlessly into your outdoor space and aligns with your vision for the project. Here are detailed steps to follow when marking the area for excavation:
- Outlining the shape and size of the water feature: Before marking the ground, carefully consider the desired shape and size of the water feature. Whether you opt for a serene pond, a cascading waterfall, or a stylish fountain, visualize the layout to determine the best placement within your backyard oasis.
- Using spray paint or stakes to mark boundaries: Once you have a clear idea of the water feature’s dimensions, use spray paint or stakes to outline the boundaries on the ground. This step helps you visualize the actual size of the water feature and ensures that the excavation area is accurately defined.
- Ensuring proper clearance from other structures or utilities: While marking the area, it is essential to consider the surrounding structures, such as trees, fences, or utility lines. Ensure that there is adequate clearance around the water feature to prevent any interference or potential damage during the installation process. Verify the location of underground utilities to avoid any accidental disruptions.
By meticulously marking the area for excavation, you set the foundation for a successful installation of a water feature in your backyard oasis. Taking the time to plan and outline the space ensures a seamless and visually appealing addition to your outdoor sanctuary.
Digging the Foundation for the Water Feature
- Removing sod and topsoil from the marked area: Prior to digging the foundation for your water feature, it is essential to clear the designated spot of any existing sod and topsoil. This step ensures a clean and level surface for the installation process to commence smoothly.
- Digging to the appropriate depth for the water feature: Once the area is cleared, the next crucial step is to dig to the appropriate depth for the water feature. The depth will depend on the type and size of the water feature you intend to install. It is imperative to follow the manufacturer’s guidelines or design specifications to ensure proper functionality and aesthetic appeal.
- Creating shelves or ledges for plants or decorative elements: As you dig the foundation, consider incorporating shelves or ledges within the structure. These elements can serve as platforms for placing plants, rocks, or other decorative features that will enhance the overall look of the water feature. Careful planning and execution during this stage will contribute to the visual appeal and functionality of your backyard oasis.
Creating a Sturdy Base for the Water Feature
- Leveling the excavated area: Before proceeding with the installation of your water feature, it is crucial to ensure that the excavated area is level. This will help prevent any issues with the stability and functionality of the feature over time. Using a level tool, carefully check the surface to make sure it is even and adjust as needed.
- Adding a layer of sand or underlayment for stability: Once the area is leveled, the next step is to add a layer of sand or underlayment to provide a stable base for the water feature. This layer will help distribute the weight of the feature evenly and reduce the risk of shifting or sinking. Spread the sand or underlayment evenly across the excavated area to create a solid foundation.
- Compact the base to prevent shifting or settling: To further enhance the stability of the base, it is essential to compact the sand or underlayment layer. This can be done using a hand tamper or a mechanical compactor, depending on the size of the project. Compact the base thoroughly to ensure that it is firm and secure, which will help prevent any potential issues with shifting or settling once the water feature is in place.

Installing the Water Feature Components
When setting up a water feature in your backyard oasis, the installation of the water feature components is a crucial step that requires attention to detail and careful planning. This phase involves placing the pond liner or fountain basin, installing the pump, connecting tubing, and adding rocks, stones, and water plants to create a harmonious and visually appealing water feature.
Placing the Pond Liner or Fountain Basin
The first step in installing the water feature components is to carefully place the pond liner or fountain basin in the desired location within your backyard oasis. Ensure that the liner or basin is level and properly positioned to prevent any leaks or uneven water distribution. The pond liner serves as the foundation for your water feature, providing a watertight barrier to contain the water and create the desired shape and depth for your pond or fountain.
Installing the Pump and Connecting Tubing
Once the pond liner or fountain basin is in place, the next step is to install the pump that will circulate the water within the water feature. Position the pump at the appropriate depth to ensure proper water flow and circulation. Connect the tubing to the pump, ensuring a secure and watertight seal to prevent leaks. The tubing will carry the water from the pump to the fountain or waterfall, creating movement and adding a soothing sound to your backyard oasis.
Adding Rocks, Stones, and Water Plants
To enhance the aesthetic appeal of your water feature, carefully arrange rocks, stones, and water plants around the pond liner or fountain basin. Use a variety of sizes and shapes to create a natural and visually appealing landscape. Rocks and stones can be used to create cascades, waterfalls, and edging around the water feature, adding texture and dimension to the design. Water plants such as lilies, lotus, and water hyacinths can be added to the pond to introduce color, fragrance, and wildlife habitat to your backyard oasis.
Installing the Water Feature Components
When it comes to placing the pond liner or fountain basin in your backyard oasis, meticulous attention to detail is crucial to ensure the success and longevity of your water feature. Here are the essential steps to follow:
- Positioning the liner to fit the excavated area: Carefully lay out the pond liner or fountain basin in the designated spot within your backyard. Ensure that it aligns perfectly with the excavated area, leaving no gaps or overhangs that could compromise the integrity of the water feature.
- Ensuring proper overlap and coverage: Check that the pond liner or fountain basin provides adequate coverage for the entire water feature. There should be enough material to accommodate the depth and shape of the pond or basin, with a sufficient overlap to prevent any leaks or seepage.
- Securing the liner in place with rocks or soil: Once the pond liner or fountain basin is correctly positioned and fitted, secure it in place by carefully placing rocks or soil along the edges. This not only helps to anchor the liner securely but also creates a naturalistic border that seamlessly blends with the surrounding landscape. Be thorough in this step to prevent any shifting or movement of the liner once water is added to the feature.
When installing the pump and connecting tubing for your water feature, it is essential to follow a systematic approach to ensure proper functionality and aesthetics in your backyard oasis.
Placing the Pump in the Designated Location
1. Select an Ideal Spot: Begin by choosing a location for the pump that is close to the water feature yet hidden from plain view. This will help maintain the visual appeal of your backyard oasis while ensuring easy access for maintenance.
2. Level the Surface: Before placing the pump, make sure the surface is level to prevent any potential issues with the pump operation. Use a level tool to check the stability of the chosen spot.
3. Secure the Pump: Once you have identified the optimal location, secure the pump in place to prevent movement or vibrations that could affect its performance. Consider using a sturdy base or platform to support the pump.
Connecting the Tubing to the Pump and Water Feature
1. Measure and Cut Tubing: Measure the required length of tubing to connect the pump to the water feature. Use a sharp cutting tool to ensure clean and precise cuts that will facilitate a secure connection.
2. Attach Tubing to the Pump: Connect one end of the tubing to the outlet of the pump, ensuring a tight fit to prevent any leaks. Consider using hose clamps or connectors for added security.
3. Route the Tubing: Carefully route the tubing from the pump to the water feature, taking into account any obstacles or landscaping features that may require adjustments. Conceal the tubing using strategic placement or decorative elements to maintain the aesthetic appeal of your backyard oasis.
Concealing Tubing or Creating a Hidden Route for Water Flow
1. Utilize Landscaping: Incorporate existing landscaping elements such as rocks, plants, or mulch to conceal the tubing along its path. This will seamlessly integrate the water feature into the natural surroundings of your backyard oasis.
2. Create a Hidden Route: If concealing the tubing within the landscape is not feasible, consider creating a hidden route using underground conduits or channels. This method allows for a clean and unobtrusive water flow while preserving the overall beauty of your outdoor space.
By following these steps to install the pump and connect tubing for your water feature, you can enhance the tranquility and visual appeal of your backyard oasis with a harmonious water element.
Incorporating rocks, stones, and water plants into your water feature not only enhances its visual appeal but also contributes to its functionality.
- Arranging rocks and stones for a natural look:
- Begin by placing larger rocks or boulders around the edges of the water feature to create a natural border.
- Layer smaller stones and pebbles strategically to mimic a stream or riverbed.
- Consider using a variety of colors and shapes to add depth and dimension to the overall design.
- Incorporating water plants for filtration and aesthetics:
- Choose a mix of submerged, floating, and marginal plants to promote a healthy ecosystem within the water feature.
- Submerged plants like anacharis and hornwort help oxygenate the water and provide shelter for aquatic life.
- Floating plants such as water lilies not only add beauty but also help shade the water, reducing algae growth.
- Marginal plants like cattails and iris can soften the edges of the water feature while assisting in natural filtration.
- Balancing the design with varying sizes and textures:
- Mix different sizes of rocks and stones to create visual interest and a more natural appearance.
- Contrast smooth river rocks with rougher textured stones to add tactile appeal.
- Integrate a variety of water plants with different foliage shapes and colors to achieve a harmonious balance in the overall composition.
Filling and Testing the Water Feature
- Filling the water feature with clean water: Begin by filling the water feature with clean, fresh water. Ensure that the water level reaches the appropriate height for optimal functioning of the feature. Use a hose or buckets to carefully add water without disturbing any rocks or plants that may be part of the feature.
- Checking for leaks or issues: Once the water feature is filled, carefully inspect the entire structure for any signs of leaks or issues. Look for wet spots, dripping water, or unusual pooling around the base of the feature. Address any leaks promptly to prevent water loss and potential damage to the surrounding area.
- Testing the pump and adjusting flow rate: After filling the water feature and ensuring there are no leaks, it is crucial to test the pump to confirm proper functionality. Turn on the pump and observe the flow of water through the feature. Check for any unusual noises or vibrations that may indicate a problem with the pump. Additionally, adjust the flow rate as needed to achieve the desired water movement and sound level for your backyard oasis.
Filling the Water Feature with Clean Water
- Using a hose or buckets to fill the feature
When filling your water feature, you can use a standard garden hose for convenience or opt for buckets if the feature has a smaller capacity. Ensure that the water source is clean to prevent any debris or contaminants from entering the feature.
- Allowing water to settle and adjust to temperature
After filling the water feature, allow the water to settle to remove any air bubbles that may have formed during the filling process. It is essential to let the water adjust to the ambient temperature of your backyard to create a harmonious environment for aquatic plants and wildlife.
- Treating water with conditioners or additives as needed
Depending on the type of water feature and the intended use, you may need to treat the water with conditioners or additives. This step is crucial for maintaining water quality, balancing pH levels, and promoting the health of aquatic life. Be sure to follow the manufacturer’s instructions and recommended dosage when adding any water treatments.
Checking for Leaks or Issues
Filling and Testing the Water Feature
- Inspecting the Liner and Edges for Leaks
- Carefully examine the entire surface of the liner for any signs of tears, punctures, or wear.
- Check around the edges of the water feature where the liner meets the surrounding materials for any potential leaks.
- Run your hand along the liner to feel for any abnormalities that could indicate a leak.
- Monitoring Water Level for Any Drops or Fluctuations
- Fill the water feature to the recommended level and mark it with a pencil or tape.
- Leave the water feature running for a few hours and then check if the water level has dropped below the marked point.
- Keep an eye on the water level over the next couple of days to ensure it remains consistent without any unexplained fluctuations.
- Addressing Any Issues Before Proceeding with Final Touches
- If you notice any leaks or drops in water level, pinpoint the source of the issue and assess the severity.
- Repair minor leaks with a waterproof sealant or patch kit designed for your specific liner material.
- For more significant problems, consider draining the water feature, fixing the issue, and refilling it before adding any finishing touches.
Testing the Pump and Adjusting Flow Rate
Once the water feature is filled and ready for operation, the next crucial step is to test the pump and adjust the flow rate to ensure optimal performance. This process involves fine-tuning the settings to achieve the desired water circulation and sound level.
Turning on the Pump and Adjusting Settings
- Start by turning on the pump and observing the initial flow of water through the feature.
- Check for any unusual noises or vibrations that may indicate issues with the pump.
- Monitor the water flow pattern to ensure it aligns with the design of the water feature.
Ensuring Proper Water Circulation and Flow
- Verify that the water is circulating effectively throughout the feature, reaching all intended areas.
- Adjust the pump settings if certain areas are not receiving adequate water flow.
- Proper circulation is essential not only for aesthetic reasons but also to maintain water quality.
Fine-Tuning the Pump for Optimal Performance and Sound
- Experiment with different flow rates to find the ideal balance between visual appeal and soothing sound.
- Consider the size of the water feature and the surrounding environment when adjusting the flow rate.

- Aim for a gentle, consistent flow that enhances the overall ambiance of your backyard oasis.
Adding Final Touches and Maintenance
After completing the installation of your backyard water feature, you can enhance its aesthetics and functionality by considering the following final touches and maintenance steps:
- Adding Lighting or Additional Features
To create a captivating ambiance around your water feature, consider incorporating lighting elements such as underwater lights, spotlights, or string lights. These additions can illuminate the water feature at night, highlighting its beauty and creating a soothing atmosphere in your outdoor space. Additionally, you may choose to add decorative elements like floating plants, rocks, or sculptures to further enhance the visual appeal of the water feature.
- Establishing a Maintenance Routine
Regular maintenance is essential to keep your backyard water feature in optimal condition. Develop a maintenance routine that includes tasks such as cleaning debris from the water surface, checking and maintaining the pump and filtration system, and treating the water to prevent algae growth. By staying proactive with maintenance, you can ensure that your water feature remains clean, functional, and visually appealing for years to come.
- Enjoying and Caring for Your Backyard Water Feature
Once you have added final touches and established a maintenance routine, take the time to enjoy and care for your backyard water feature. Spend moments relaxing by the water, listening to the soothing sounds it creates, and observing the wildlife it may attract. Incorporate your water feature into your daily routine, whether it’s through meditation sessions, outdoor dining experiences, or simply unwinding after a long day. By appreciating and caring for your water feature, you can truly make it the centerpiece of your backyard oasis.
Adding Lighting or Additional Features
When considering adding lighting or other features to your water feature, it’s essential to enhance both the aesthetic appeal and functionality of your backyard oasis. Here are some key steps to consider:
- Installing Underwater Lights or Spotlights: Submerging lights in the water feature can create a mesmerizing effect, especially at night. LED lights are a popular choice for their energy efficiency and durability. Strategically placing underwater lights can illuminate the water’s movement and highlight any aquatic plants or decorative elements.
- Incorporating a Fountain Nozzle or Decorative Spout: Adding a fountain nozzle or decorative spout can introduce movement and sound to your water feature. Choose a design that complements the overall style of your backyard oasis. Whether you opt for a gentle cascade or a more dramatic spray, the fountain feature can become a focal point that adds a sense of tranquility to the space.
- Enhancing the Ambiance with Nighttime Illumination: To enjoy your water feature after dark, consider adding ambient lighting around the perimeter. Solar-powered lights are a sustainable option that can be easily installed without the need for wiring. Path lights, floating solar lights, or string lights can create a magical atmosphere around your water feature, making it a captivating element of your outdoor retreat.
Establishing a Maintenance Routine
- Cleaning Debris and Algae Regularly
- Remove fallen leaves, twigs, and other debris from the water feature using a skimmer or net.
- Scrub the surfaces of the water feature to prevent the buildup of algae and other organic matter.
- Consider adding a biological algae control product to maintain water clarity and quality.
- Checking Pump and Filter for Clogs
- Inspect the water feature’s pump regularly to ensure it is functioning correctly and clear any obstructions.
- Clean or replace the filter as needed to prevent clogs and maintain optimal water circulation.
- Test the pump’s flow rate periodically to guarantee proper operation.
- Monitoring Water Quality and pH Levels
- Use a water testing kit to check the pH, ammonia, nitrite, and nitrate levels in the water feature.
- Adjust the water chemistry as necessary to maintain a balanced ecosystem for plants and aquatic life.
- Consider adding beneficial bacteria to help break down organic waste and maintain water clarity.
Incorporating these maintenance tasks into a regular routine will help ensure that your water feature remains a healthy and beautiful focal point in your backyard oasis.
Enjoying and Caring for Your Backyard Water Feature
Adding Final Touches and Maintenance
- Relaxing by the Soothing Sounds of Running Water
Sitting near your backyard water feature provides a peaceful ambiance, as the gentle trickling or bubbling sound of water can create a calming atmosphere. This can be an ideal spot for meditation, reading a book, or simply unwinding after a long day. The soothing sounds can drown out noise pollution from the surroundings, allowing you to fully immerse yourself in the tranquility of your outdoor space.
- Observing Wildlife Attracted to the Feature
A water feature in your backyard can act as a magnet for various forms of wildlife. Birds may come to drink or bathe in the water, while butterflies and dragonflies might be attracted to the moisture. Additionally, frogs, turtles, or even small fish could make your water feature their home. Observing these creatures can provide a sense of connection to nature and enhance the overall biodiversity of your backyard oasis.
- Taking Pride in Creating a Tranquil Oasis in Your Backyard
Maintaining your water feature not only ensures its longevity but also allows you to take pride in the oasis you’ve created. Regular cleaning, checking for debris, and ensuring proper water circulation can help preserve the beauty and functionality of the feature. By dedicating time to care for your water feature, you can continue to enjoy its benefits and aesthetic appeal for years to come.
FAQs: Installing a Water Feature in Your Backyard Oasis: A Step-by-Step Guide
Can I install a water feature in my backyard if I have limited space?
Yes, you can still install a water feature in your backyard even if you have limited space. There are many small-scale options available such as fountains, bubbling rocks, or even a small pond that can fit into tight spaces. It’s important to plan ahead and choose a water feature that fits the size of your backyard.
How do I choose the right water feature for my backyard oasis?
When selecting a water feature for your backyard oasis, consider factors such as the size of your space, budget, maintenance requirements, and personal preference. Think about whether you want a soothing sound of running water or a focal point that adds visual interest to your outdoor space. Research different types of water features like ponds, waterfalls, or fountains to determine which best suits your needs.
Do I need to hire a professional to install a water feature in my backyard?
While hiring a professional landscaper or water feature specialist can make the installation process easier and ensure the job is done correctly, it is possible to install a water feature on your own. Many DIY kits are available for various types of water features, and there are plenty of online resources and tutorials to guide you through the installation process. Just make sure to carefully follow all instructions and safety precautions.
How do I maintain a water feature in my backyard oasis?
Proper maintenance is essential to keep your water feature running smoothly and looking its best. Regularly clean out debris, check and adjust water levels, and perform routine maintenance tasks as needed. Be sure to follow any specific care instructions provided by the manufacturer or installer to ensure the longevity of your water feature. Investing in a quality pump and filtration system can also help keep your water feature in top condition.
What are some safety considerations when installing a water feature in my backyard?
Safety should always be a top priority when installing a water feature in your backyard oasis. Make sure to securely anchor any structures or rocks to prevent accidents, and consider installing a protective barrier if you have young children or pets. If you’re installing a pond, ensure it has proper fencing or covers to prevent accidents. Additionally, be cautious with electrical components and always follow safety guidelines when working with water and electricity.